

The barndominium has shed its reputation as a mere niche trend. Today, it stands as a legitimate, highly desired option for homeowners seeking space, durability, and a departure from the ordinary. Combining the rustic utility of a barn with the comforts of a modern home, these structures offer a unique blend of form and function.
However, building one is not the same as constructing a traditional stick-built house. The process requires a specific sequence of events, a different set of priorities, and an appreciation for the unique materials involved. For those considering this path, understanding the complete construction timeline is essential for a smooth and successful project.
Phase 1: The Blueprint – Planning and Design
Before a single shovel hits the dirt, the vision must be solidified. The planning phase for a barndominium is arguably the most critical. Because these structures are often highly customized, generic house plans rarely suffice.
The first step involves establishing the primary function. Is the goal a massive workshop with a small living quarters attached, or a full-scale family home with a garage? This dictates the ratio of “barndo” to “dominum.”
Crucial to this phase is the selection of the structural system. While some opt for traditional wood framing, the quintessential barndominium relies on a post-frame or steel frame structure. This choice affects everything from insulation requirements to exterior finishing. During design, careful attention must be paid to window placement for natural light, roof pitch for drainage and aesthetics, and the layout of utilities, which can be more complex to route in an open-concept metal building than in a traditional framed home.
Phase 2: Site Preparation and Foundation
Once plans are finalized and permits are secured, the physical work begins. The site must be cleared and graded. Proper drainage is paramount; water must be directed away from the future foundation to prevent structural issues.
When it comes to the foundation, the barndominium offers flexibility. Options typically include:
- Slab-on-Grade: The most common choice for barndominiums, offering a solid, low-maintenance base. Plumbing lines must be precisely placed before the concrete is poured.
- Pier and Beam: Often used in areas with expansive clay soils or flood risks, this raises the home off the ground but requires skirting to protect the underside from the elements.
- Basement: Less common but possible, adding significant cost and complexity due to the excavation required around the steel frame.
Phase 3: Erecting the Shell
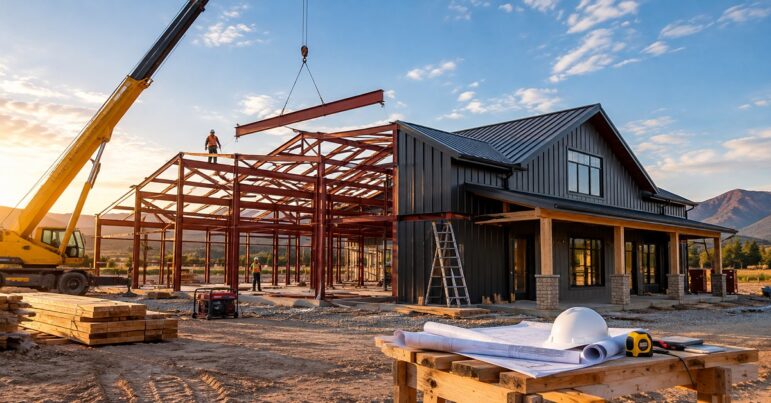
This is the phase where the barndominium truly takes shape. For a steel-framed structure, a crane typically lifts the primary I-beams and columns into place. These are bolted together to create the skeleton of the home. If a post-frame construction method is used, laminated columns are set into the ground or on the foundation, and wooden trusses are erected.
Once the frame is secure, the exterior sheathing and roofing are installed. This is often metal siding and a metal roof, which provide the iconic look and exceptional durability associated with these buildings. At this stage, the structure is “dried in,” meaning it is protected from the weather, allowing interior work to begin.
Phase 4: Framing and Rough-Ins
While the exterior shell is up, the interior is still a cavernous space. The next step is framing the interior walls. This creates the distinct rooms—bedrooms, bathrooms, and closets—within the large footprint.
Following interior framing, the “rough-in” work begins. This is the behind-the-scenes infrastructure that makes the home livable:
- Plumbing: Supply and drain lines are run through the walls and floors.
- Electrical: Wiring is pulled for outlets, switches, and fixtures.
- HVAC: Ductwork is routed. Because metal buildings can be prone to temperature fluctuations, proper HVAC design is vital to ensure even heating and cooling throughout the large space.
Phase 5: Insulation – The Critical Differentiator
Insulating a barndominium is not a task for standard fiberglass batts alone. The thermal dynamics of a metal building are different from a wood-framed house. Without proper insulation, condensation can form on the metal, leading to rust and mold.
The industry standard for barndominiums is Spray Polyurethane Foam (SPF). This expands to fill every crack and crevice, creating an airtight seal and acting as a vapor barrier. This step is non-negotiable for energy efficiency and moisture control. Once the foam is applied, the space feels significantly more like a traditional home and less like a warehouse.
Phase 6: Interior Finishing
With the mechanicals hidden and the space insulated, the transformation into a home accelerates. Drywall is hung, taped, and textured. This step is transformative, covering the metal framing and foam to create smooth, familiar walls.
Next comes the installation of flooring, cabinetry, and countertops. Trim work—baseboards, door casings, and window sills—adds the final architectural details. Paint and stain bring the color palette to life.
Phase 7: Exterior Finishing and Landscaping
The final touches on the exterior may include adding porches, decks, or a lean-to for additional outdoor living space. Landscaping is installed to soften the sharp lines of the building and integrate it into the surrounding environment. Driveways and walkways are poured or laid.
The Final Walkthrough
Before the keys are handed over, a final inspection ensures all systems are operational and the workmanship meets standards. Once the certificate of occupancy is issued, the barndominium is officially ready.
Building a barndominium is a journey that rewards careful planning and an understanding of its unique construction rhythm. It is a marriage of industrial strength and domestic comfort, resulting in a home that is as tough as it is beautiful.